
I am a nerd. Loudly and proudly. I am also a huge procrastinator and scatterbrain. Put these two things together, and this is what you get…
The Procrastinerdor Presents:
Cosplaying: A Last-Minute Thor costume for ECCC
I’ve been going down to Seattle from Vancouver for Emerald City Comic for four years now. This year we brought a friend who is new to conventions and we thought HEY! Wouldn’t it be fantastic to induct her into the wild and crazy world of con by organizing a group cosplay! HUZZAH! We chose to do female versions of the Avengers, and based on my height and size, we decided I’d make a great Thor (when it comes to Avengers I’m OBSESSED with all things Maximoff twins, but for our group we were leaning more towards the current movie franchise). It was either Thor or Hulk for me, and wandering around in green body paint was a step further than I was willing to go.
Now! Of course we planned all of this well in advance and I…put it off. And put it off. It wasn’t until our Nick Fury texted a pic of the rocket launcher she built out of PVC pipe that I realized I needed to get my butt in gear. I had purchased all the pieces I wanted to put together for the costume, but I needed to modify them and get the look right. And at that point, I only had three days.
I had already purchased a toy Mjolnir (mew mew) from Toys R Us, as well as a kid’s mask for my helmet. I figured so long as the helmet looked really good, everything else would fall into place. I got a cute little black dress from H&M, cotton with a leatherette sweetheart shaped applique on the front, which mimicked armour. A wig ordered from eBay was inbound. I had fake-fur lined winter boots. I had leather gauntlets (‘“alternative” clothing shops are an awesome resource for costumes!). All I really needed to focus on was modifying the helmet and creating my cape.
Part 1: the helmet
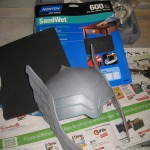
Here’s the store-bought kid’s mask I got at Toys R Us. Not too bad looking, except that the stripes at the front glow in the dark. I’m fairly certain the son of Odin doesn’t glow in the dark, so that was going to have to change!
Inside the helmet there was this rubber forehead rest…thing. To be honest I wasn’t entirely sure what the purpose of this band was, but I wanted to get rid of it. So I got out my Dremel tool. The Dremel and I have a serious love/hate relationship, in that I really want to make it work but I’ve never really figured out how. In this case, though, Mr Dremel and I got along well enough to take off the plastic pegs that held the rubber piece in place.
I cut the rubber up with regular scissors and peeled it out of the helmet before gently and carefully wielding my Dremel. The Dremel was also great for filing down the hard plastic after I got the pegs to snap off too. I used a cut-off wheel, one of the standard accessories that comes with the tool. All in all, Dremel was really great for this little part of my project, and I’m considering a committed, long-term relationship, but that’s a wholly different blog topic…
Next, I sanded the plastic to get it ready for painting. I used 600, which is very soft. The higher the number on a sandpaper the finer the grit, which always confuses me because my brain feels it should be the other way around! Any way, I didn’t want to scratch the plastic, I just wanted to take off the shiny finish so the spray paint would adhere better.
Once the entire surface of the helmet was sanded, including the “wings”, I taped that area off with masking tape. I needed the bare plastic there in order to glue on feathers later, and I was worried the spray paint would just make the glue peel off. It was probably an unnecessary step but I wanted to be sure everything was prepared properly!
Before I started the metallic effect on the helmet, I sprayed the whole thing with a coat of black primer. I didn’t even know such a thing existed, so when the guy at the craft store showed it to me I was over the moon! It really made a great base for the finish I wanted to do. For the record, I can’t honestly remember where I learned how to do this paint effect. I used to do faux-finishing and home painting for a living and absorbed a host of techniques with no recollection of how or where, whether it was a colleague, a TV show, the internet or a book. But the effect is simple enough to do: you take silver spray paint, and give the item (in this case, my helmet, obviously) a thick coat of paint. Then, while it’s still wet, take black spray paint and “mist” it lightly over the silver. As it all dries together, you get a speckled, almost hand-forged effect.
I did a couple of passes to get a bit more depth in the speckles! I also took a white metallic craft paint and dry brushed it here and there into the lines of the helmet to get a bit more dimension and highlight. Once it was all dried, I sprayed on a coat of sealer for protection.
After letting the sealer dry overnight I started gluing the feathers onto the wing areas of the helmet. If you get nothing else from the article, I want everyone to know how awesome Mod Podge is. This stuff is amazing, you can use it for anything. You’ll see what I mean later on with the armour I tried to build. Incredible stuff for all crafts, but especially useful for cosplay!


Part 2: the armour
Now, I have to preface this part by saying that my armour failed. Or, more accurately, I didn’t have time to complete it once I figured out how to fix the problem I was having. Mod Podge came to the rescue, but a little too late. Here’s what happened…

I purchased children’s hockey pads (on sale, only $16!) and planned to take off the front panel, then create straps, so I could wear the armour like a backpack. I started to spray paint the fabric when I discovered my issue…

When I sprayed the pads, the fabric took the primer really well, but I didn’t account for the decals on the shoulders with that company logo in the “S” shape. The vinyl stuff ended up looking more and more shiny when I sprayed, and more and more obvious. I thought to myself, hey! I’m sure it’ll be less obvious when I do the faux-finish, so I have nothing to worry about…

WRONG. As I applied the first coat of silver spray paint, the logo became even MORE obvious. Ack! At this point I was in a panic. What to do?! I needed something to cover the entire area, but what? I could sew some silver fabric on there, but then it wouldn’t look like metal, and it wouldn’t match my helmet! What to do, what to do…
Then it occurred to me: you can LAYER Mod Podge and build it up like modeling clay!

I used a sponge brush to blot on each layer, so it would have a hammered metal texture. Each pass takes about 30 minutes to dry, and needs 24 hours to cure and set. I had my fingers crossed that I’d have the time to paint it…

Unfortunately, I needed at least two more layers of Mod Podge before the logo would disappear completely, and I only had one day left before con! So I wracked my brain for a plan B: a while back I had found a funky 90s metal belt at Value Village (aka, costuming heaven). I had the intention of using it to create buckles for a cape on a Scarlet Witch costume (which I have yet to get done, naturally). I had already used pieces of the belt for a Chun Li Halloween costume and knew they were the solution to my issue.


I did the same paint effect on the disks and chain as I had done on the helmet, for continuity.
All that was left was sewing in the cape. I purchased inexpensive broadcloth at the local fabric shop: that’s another great product for costuming, if you don’t want to spend an arm and a leg on fabric for a cape that’s likely to get stepped on!
I tucked the corner of the fabric into the loop at the top of the disk, where a metal clasp used to link it to the next disk, and so on, back when it was a belt. I sewed it by hand (with help from my Nick Fury!) and left some “ruching” for dramatic effect!
And there you have it: the Procrastinerdor’s last-minute Thor costume for Emerald City Con. I had lots of requests for photos with fellow con-goers, which was great, considering there were multiple other Thors wandering the convention floor, both male and female. I had an awesome time telling Loki cosplayers they were adopted and shouting “FRIEND ROGERS!” at the Captains America (one guy looked at me like I was completely and utterly mental, maybe he just didn’t get it?).

Photo credit: Damon O’Keefe (damonokeefe.com)
All in all, a very pleasant experience and a successful costume, in my opinion!


