

 Pie always seemed intimidating to me. Pie is so idiosyncratic, and therefore people have many opinions about it. Because, despite the idiom “easy as pie,” pies really aren’t all that easy. But like many things in life, the less easy things are intensely gratifying to master, which is why I am I here to tell you that you should absolutely learn how to make pie. Despite the idiosyncrasies of pie and pie lovers, pie is always appreciated. People know it’s an effort.

And any good pie begins with a pie crust – the most idiosyncratic part of an already idiosyncratic baked good. (How many times do you think I can use the word “idiosyncratic”? It’s a great word.)
And in keeping with the Twin Peaks Log (remember: our log does not judge), an idiosyncratic show with idiosyncratic characters, we will be sharing our own idiosyncratic tips and techniques for making pie and pie crusts. What this means is an opportunity for you to PLAY! To figure out what your own preferences and pie idiosyncrasies are, and then go forth and impress the hell out of people.
(Fun fact: The first pie crusts were not edible. They were called “coffins” and merely served the purpose of being a cooking vessel. The first recorded edible pie crust did not appear until 1379. Food geeks you can learn more here.)
I am first on deck, and I am going to share my go-to pie crust: Buttermilk Pie Crust. The recipe is barely adapted from my favorite food blogger, Joy the Baker. It was Joy’s gentle chiding that gave me the gumption to tackle pies in the first place, so I like that my favorite crust pays homage to her. This Peach Blueberry Pie was my first. Since then, I have tried numerous crust recipes and techniques, attended classes, read up on the history of pie, and so on, but I always go back to Joy’s buttermilk crust. However, along the way, I have compiled different techniques into my own pie-making idiosyncrasies.
But before we get into that, here is the adapted recipe from Joy. (It makes a double crusted 9-inch pie crust, you can halve it if you are just doing a single layer crust, but freezing the extra crust is always an option.)
Ingredients
Buttermilk Pie Crust
2 1/2 cups all-purpose flour
1 tablespoon sugar
1 teaspoon salt
2 sticks cold unsalted butter
1/2 cup buttermilk + 2 tablespoons
Before, we even get started on the pie crust-making though, let’s talk about ingredients and utensils. You can use whatever you have lying around and still make an excellent pie crust, but as you develop your pie-syncrasies, you will start to notice subtle differences in the ingredients and develop preferences for certain utensils. Here are mine:
Flour
I prefer King Arthur’s, but it can be hard to find, so in that case I go with Gold Medal. Play around and figure out what you like best and what is available in your area. It also helps to aerate your flour first before measuring it out. Usually this is achieved by shifting. Further, measuring flour can be tricky. I am lazy so I just use Joy’s technique: aerating flour and measuring flour.
Butter
If you are feeling luxurious (and can find it), go for a European-style butter with an 82% or higher fat content. That’s a little harder to find where I am at, so I find Land O’ Lakes unsalted sweet cream to be a good compromise.
Buttermilk
Where I come from, it’s hard to find full-fat cultured buttermilk in anything but large sizes. Since buttermilk sours pretty fast, this can lead to a lot of wasted buttermilk. If you can, go for full-fat. Fats make a difference in baking.
Utensils
Avoid using plastics; try to stick to metals, woods, and/or silicone. Plastic and wood both get food embedded in them, and plastic can sometimes leave traces of odd flavors. If you use wood, make sure you have wooden utensils reserved for baking only. You’d be surprised how the wooden spoon you used to mix that garlic lends a garlic tinge to your otherwise delicious cherry pie.
Directions
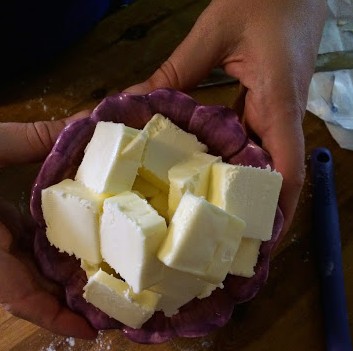 1. Slice the butter into chunks like so:
Place in the fridge to keep chilled. Temperature is crucial in getting a perfectly flaky crust.
2. In a large mixing bowl, add flour, sugar, and salt. Whisk together. If you read Joy’s posts on aerating flour, you will know whisking is important for this very reason. Whisk, don’t stir.
4. Get the cubed butter from the fridge and place throughout the flour mixture, making sure the pieces don’t stick together or clump.

5. Once all the butter is in, use a wooden mixing spoon to gently coat the butter pieces.

6. Once your butter is coated, it is time for the best part – mixing the butter into the flour mixture. Now this can be controversial. I know, mixing butter into flour controversial? But pie people are fastidious folk. Some recipes call for using food processors or pastry cutters. I have tried both. I still use my hands. The recommendation for not using your hands is that using your hands warms up the dough a lot faster which can lead to a less flaky crust. (This is why you always wanted to make sure your butter is chilled.) I find mixing butter into flour with my hands a truly therapeutic experience, and the smell of butter in flour magical, so I sacrifice a slightly less flaky product for a more therapeutic process. And people still rave about my crust. Anyway, one of the best ways to mix the dough by hand is to scoop the dough into your hands, then use your thumbs to push the dough through your fingers like so:

This helps avoid clumping. Your dough should start to resemble a crumble with approximately pea-sized butter chunks like so:

You are good to go. A larger chunk here or there is nothing to worry about. It leads to a lovely marbled dough.
7. Now, make a little well in your dough and pour ½ cup of buttermilk into the mix.

8. Then use a spatula to bring the dough together. Now here’s another bone of contention. Some pie bakers like Joy prefer a really shaggy dough while others like Teeny Lamothe (I have attended her classes, and she’s a delight) prefer a wetter dough. Mine falls kind of in between. Once the dough starts to come together but is still pretty shaggy, I add 1-2 more tablespoons of buttermilk.

See, the thing is – the consistency of your dough can depend on a variety of factors. I find, in the hot, humid Texas summers, I need less moisture in my dough while in the winters, I tend to use more.
9. After adding the additional buttermilk, I then turn to the the highly sophisticated “claw” technique (something I learned from Teeny). Forming my hand like a claw, I use the sides of the bowl to roll the dough until it comes together:


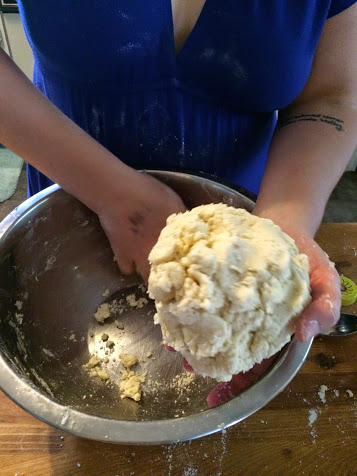
I also find using the “claw” technique prevents me from overworking the dough. An overworked dough results in a tougher crust, which is not what we want here.
10. Once your dough is together, it should look slightly marbled like so:

11. Now divide in half and wrap each individual piece in plastic wrap. If you don’t have the good fortune of having your bestie be your photographer and assistant, you should probably lay out your saran wrap beforehand. Once each individual disc is securely wrapped:

Place in fridge overnight. If you are in a rush, you should at least wait 2-3 hours for the dough to set. If you have time, don’t let the dough sit for more than 2 days.
I know, it’s a lot of little things to think about, but you know what… a lot of these rules you can break and still come out with a damn, fine pie. Play, experiment, fail. It’s so much fun.
Next time, we will talk about rolling your dough and pre-baking!
Number of times the word “idiosyncrasies” or “idiosyncratic” was used: 12 times not including my portmanteau pie-syncrasies
Number of times I had to use spell-check: Every single time

