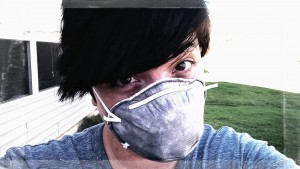
When my son first told me he wanted to be a Hunter from the video game Destiny for Halloween (and our local comic con), I was more than a little intimidated.
 I can’t deny that I did Google costumes at first, because the idea of creating this from scratch seemed beyond me. But then I started really thinking about it, and not only did it seem feasible, but it looked sort of fun. The most complicated parts of the costume would be the mask/helmet and the cloak, I figured. After looking at tons of pictures online of both screenshots from the game and cosplayers, I had some great ideas.
Although I was right that the mask and cloak would be the most difficult, none of the parts of this costume were easy! It took a lot of thinking outside the box and using random materials I had on hand to create it. Even using things like the cardboard from the boxes the plastic knife and gun came in to make up other parts of the costume, the whole get-up cost me nearly a hundred dollars.
I know.
That’s a lot for a kid’s costume.
In my previous post, I said it didn’t need to cost the earth to cosplay. I still maintain that it doesn’t, not every time, but I’ll now amend it. It depends on what you’re cosplaying. The more detailed, the less common the costume, the more it will cost you to make it from nothing. Unless you already have a huge stockpile of random cloth and craft items … which would be very cool, but probably unlikely.
The thing that’s cool about cosplaying from a video game like Destiny is that, even when you’re a specific character like a Hunter, you have a range of options on how to put together a costume. They wear a range of colors, sport various prints/emblems, many types of helmets, and use multiple weapons. The choice is yours, really. If you want to exactly replicate one of the outfits, you can do so, of course.
But you can also create your own, unique version of a Hunter—which is what we chose to do.
The first thing I tackled was the cloak. At our local Party City, I found a kid’s size vampire cloak, then sewed material over it to created a layered, ragged look. Using scissors, I cut and shredded the edges. There was no real guide for the cloak, I just looked at a lot of them online and then did what I thought worked best. After considering various established emblems, I realized it would be more interesting to create our own. Using a round paper cut-out and grey, white, blue, and yellow spraypaint, I created the Four Moons emblem.
Since the costume is for a kid, I didn’t think one of those big, trailing scarves would be the best idea, but the cloak felt incomplete without something. Cutting a large rectangle of material (different from the cloak, but still in the same muted, earthy color theme), I folded and stitched a sort of cowl that goes over the cloak’s shoulders, under the hood. The cowl adds another layer without being a choking hazard.
The next thing I worked on was converting a Zombie Hunter Nerf gun and short sword into something that a Destiny Hunter might carry. For this, I used the same silver grey spray paint that I’d used on the cloak and also a matte black spray paint. Because both items are plastic and foam, and fairly bright colored, it took several layers. I covered them both completely in the silver, then spot sprayed them with the black. I felt like this would give the props a more “burnt metal” look.
A quick little side item that I focused on after that was an extra “power pack” for the gun. Intended to slide onto a belt (along with the holster of the gun), it’s really just a little detail that was fun to add. The cool thing about choosing Destiny to cosplay from is that there are any number of interesting side items you can choose to add to the costume.
At a local Goodwill, I found greenish-grey jeans and a dark green long sleeved shirt. Both were too big for my nine-year-old, but that worked in my favor, actually. Cutting the sleeves and pant legs only added to the ragged look of the costume. For some extra armor, I took the Velcro and the straps off some skateboarding safety pads, spray painted them, and sewed them to the shoulders of the shirt. You can’t see them much under the cloak, but they give bulk and lift to the shoulder area. Add a couple old belts (leather works best, but I also used a material one), to harness the power pack and gun holster, and the costume is almost complete.
Almost!
One last key item is needed: the face mask. Every Hunter has one. There are dozens of cool styles in the game, but you can certainly create your own, like I did. The one thing I knew I wanted to do was make sure that my kiddo could see out of it. Nothing more miserable than spending most of your Halloween night, or time at a con, just trying not to walk into things. Oh, and breathing with ease was pretty important, too.
After digging through some boxes in the attic, I found an old ski mask to use as a base. Perfect. It covered his eyes, but not in a way that would make him uncomfortable. Then I took a trip to Home Depot and bought a paint fumes mask and a bunch of Superglue. (FYI, Superglue dries really fast. So don’t, uhh, get it on your fingers and then grab the tube again. Learn from my mistakes, friend.) I covered the mask’s clear plastic with paper, then spray painted the logos on the headband and the fumes mask with the matte black paint. Because of the material I was painting, it took two coats.
Using leftover cardboard from the toy gun and knife packaging, I fashioned pieces to glue onto the mask to make it look more like a Hunter’s mask. You can get creative here, since there are so many variations in the game. Once I put together what I wanted, I brought those out to the garage and spray painted them as well. Let me add here, you should be wearing your own fumes mask while doing any painting and always in a well ventilated area.
 After the mask components dried, I Superglued them together. First, I glued the fumes mask to the ski goggles and let that set. Then I added the other pieces, one by one, since you have to patiently hold them in place with a firm grip until the glue dries. All in all, I was pretty pleased with how it came out.
This costume was a lot of work, but worth it. It’s already a big hit with my kid. (Although he’s cranky I won’t let him run around the neighborhood and play in it. Are you kidding me?) It took quite a bit of planning to pull together all the pieces, but it was definitely doable. And it was a great lesson for me, to be honest. It makes me realize that while creating particular cosplay costumes might be difficult, it really pushes me to be more creative. I enjoy that.
I can’t wait to see what the kids pick next year…


Ha! Well, thanks. It’s a lot of work, but I really enjoyed it. I’m already plotting an Unbeatable Squirrel Girl costume for myself…
OMG OLIVIA PLEASE WRITE ABOUT THAT SO I CAN COPY IT FOR MYSELF!!!!!!!!
My god, you’re the coolest mom EVER. We just were told to pick something out from the costume aisle as kids! AAAH, I WANT ONE OF THESE NOW. <3